Wednesday, February 23

Yup, I built a wall.

So...it's been awhile. I apologize for that, and now it's time for me to roll out the excuses. I've been CRAZY busy! And I'll admit, I've only done ONE creative project since my last post, which I'll show you today. It's not the custom sign that I promised you, it's much, MUCH bigger than that! My boyfriend and I, with the help of some friends, built a dividing wall equipped with a door!! I still can't believe we did it... but it looks amazing. We wanted to have it completed before last weekend because family was coming to visit, so the past few weeks have been pretty occupied with it. There was a issue with the door, a drywall debacle, and mismatched paint, but it all was very serendipitous and worked out! So here are some pictures:
Our apartment in the background is was TRASHED throughout this entire process!
But it was worth it.


This was when the drywall was done without the mud. The mudding was the WORST part! I highly recommend using a professional if you are inexperienced in drywall. We used Rich & Sons Drywall and he came out last minute on VALENTINE'S DAY to fix all of our mistakes and showed us how to do it properly. Rich is an amazing man and I recommend him to anyone looking for drywall in the Lansing area. 

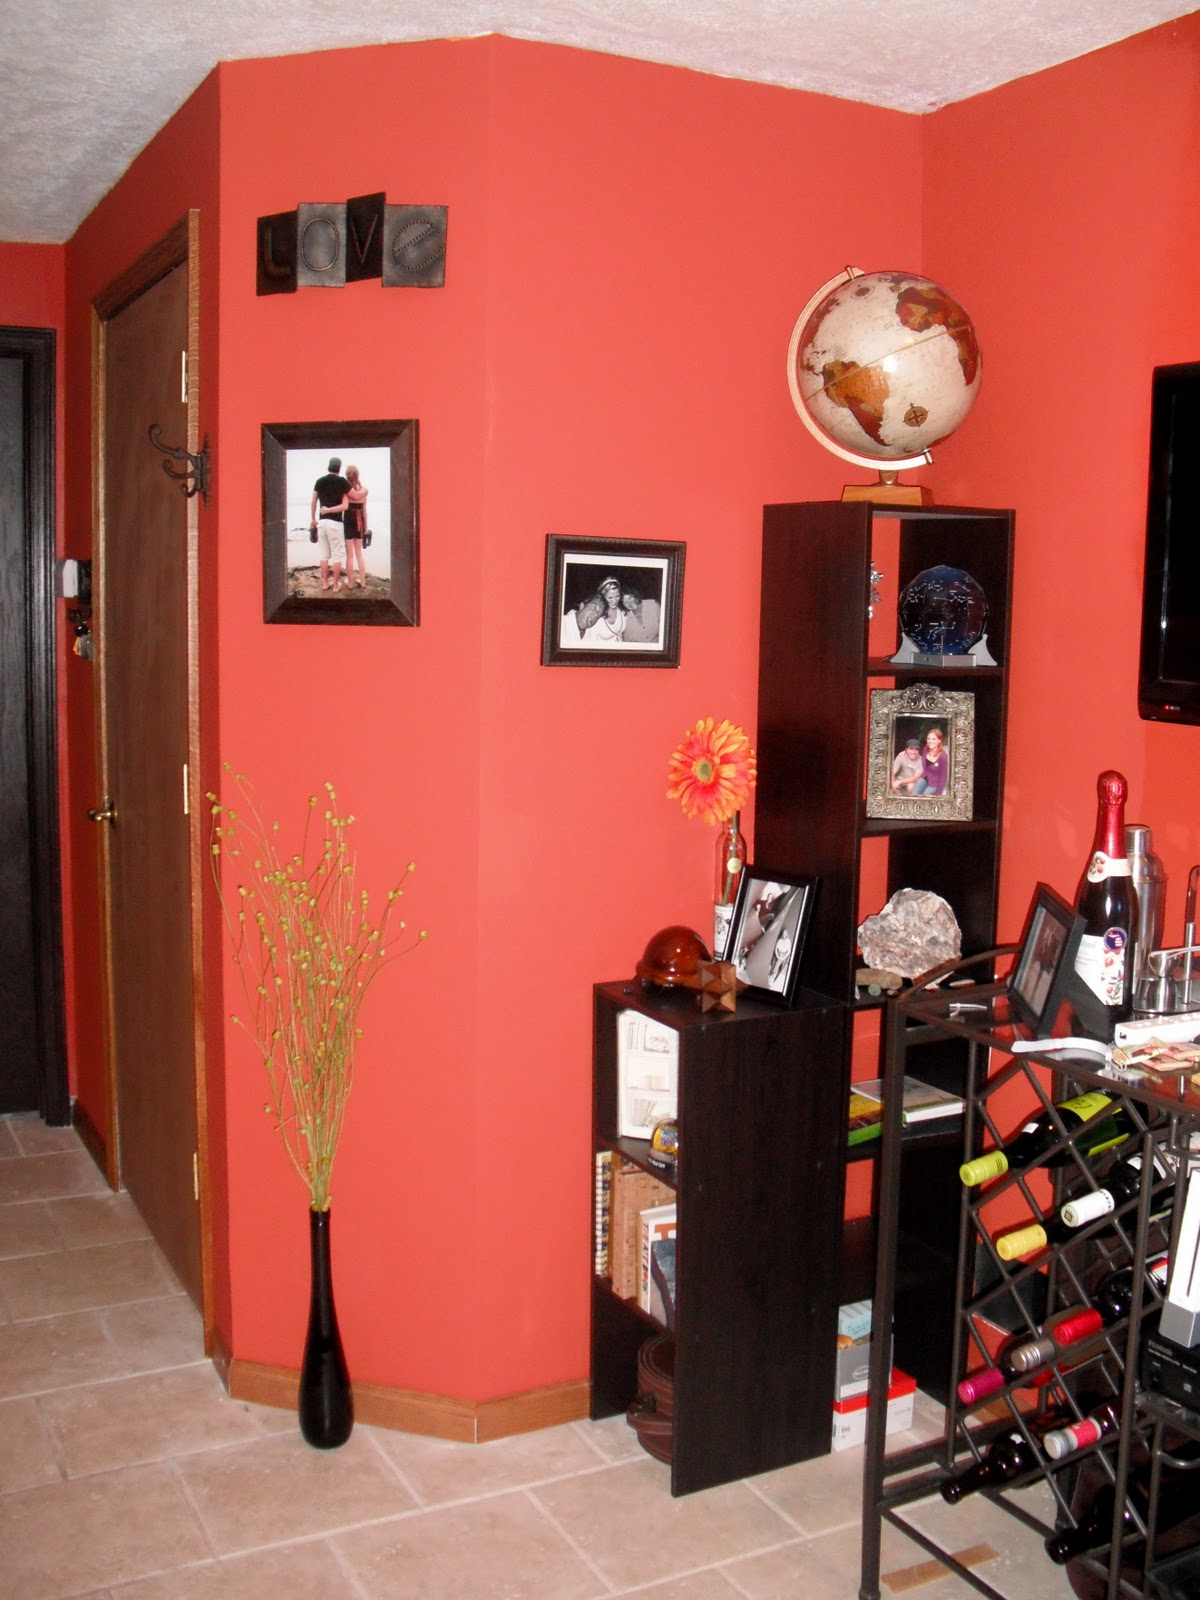
THE FINISHED PRODUCT!! Woohoo!!


I am so happy with how this turned out. The best part was, of course, the decorating! I raided the clearance sections & sales at Hobby Lobby for the wall decor and vase (which I love!), and the shelving is my favorite new feature. The corner is kind of an awkward space, and there's not much room between the wall and our wine rack/entertainment center, so I didn't want something bulky. Or expensive. Plus, I wanted shelving that faced out from both faces of the wall. Since it's doubtful that I would be able to find something so unique within the price range I was looking for (CHEAP), it was time to get resourceful.

My friend had recently purchased one of the cube shelving units and I instantly liked it. So cute, decorative, and functional. Unfortunately, my space was too small for it. I went to the section in Target where the cube storage was, and found these small shelving units. They were the exact finish I wanted (Espresso) and perfect dimensions so they wouldn't stick out too far in either direction (about 11.5"x12.5"). I saw how I could fit the pieces together in my head, brought them home, set 'em up, and voila! The exact shelving unit I wanted! Two of them are stacked and facing toward the TV, and on is set against the side of the stacked ones, facing out toward the living room.

The price was decent, each small unit was $15 at Target. I saw them at Meijer for $12, just none in the correct finish. So for $45, I had my new piece! There are so many ways to combine these shelves, and different shapes are available so you can create your custom unit. I purchased the ClosetMaid brand and am really happy with them. A few years ago I combined one of these shelves with a hutch on top of my desk and they are still structurally sound! Not bad for the price.

Well, now that the wall is out of my schedule, I'm hoping to get back on track with more projects and blog posts. I hope you all have been having a wonderful February and are staying warm! 

Saturday, January 29

Grocery Lists

Ok, so I know I promised a blog regarding "making a custom sign," but another project popped in my head that took precedence. So the sign project will just have to wait a few more days. The other project is one that can help anyone who has to go searching through cabinets or the fridge to figure out what you need from the store. A LIST! Well, really it's more than a list. It's multiple lists: one for each area that you keep food (fridge, lazy susan, pantry, etc) and is comprised of your "staples" that hold your kitchen, and life, together. It may sounds stupidly simple, but it's a total timesaver!
I'm sure some of you are super efficient at keeping a grocery list up-to-date as you need supplies (and it never ever looks like the pic to the left...), but in this household, we're not. These lists are constructed so that when we run out of something, or we notice we've run out of something, we check it off on the list. Then, when grocery day comes, or when figuring out what to make for dinner, we'll know what items we're out of. You can make these lists for anything: bathroom, tools & hardware, office supplies, etc.

Step 1: Go through your kitchen and find out the main areas you store food or supplies that need semi-frequent replenishment. Or, you can go the category route (Vegetables, Fruits, Canned Goods, etc). For my lists, I used these labels for the storage sections: Refrigerator, Freezer, Spices, Baking Supplies, Dry Goods, Pantry, Lazy Susan, Medicine & Vitamins, and Cleaning Supplies.

Step 2: List out your staples for each of these sections. To avoid lists comprised of just a few items, I combined some items onto other lists (e.g. putting potatoes and onions under the Refrigerator section, and tea under Medicine & Vitamins). My definition of a staple item is something that you'd require at least once every two months. You can visit some sites that have printable lists as well, just make sure your favorite items are incorporated. Here's a bunch of free printable lists:
http://www.freeprintablegrocerylist.com/

Step 3: Type it up! Or write it out if you're super handy with a pen. You'll want the list organized so things are simple to find. I used the sorting tool in my word program to alphabetize each list. In front of each item, I placed a checkbox which will be used to mark off which items I need to purchase. Add any other decorations you'd like, just make sure you don't clutter-up your list.

Here's a tip! If you're alphabetizing, write out sub-categories of foods with their main category first. For example, if you want several types of cheese in the refrigerator, write them like this:
Cheese - Cheddar
Cheese - Mozzarella
Cheese - Swiss
This way, they're all grouped together and easier to locate. 

Step 4: Print out the list and laminate them. You can purchase contact paper or go fancy and buy your own laminating machine. (Teachers have the added bonus of using the machine at their school!) I opted for Kinkos. Fast, simple, and for less than $2 a sheet, I had professional-looking laminated lists.

Step 5: Hang lists inside the doors of the cabinets they correspond to (using tape or velcro). I attached my refrigerator and freezer lists to the inside of the pantry door. Inside the fridge would be inconvenient. Or, if you prefer, hang them all in one place so their grouped together. I like the lists inside their corresponding cabinets so that you can mark things off immediately.

Step 6: Attach a dry erase marker next to each list. This can be accomplished simply with tape and string (the route I chose), velcro, or you can make a pen loop at the bottom of the list. Of course, if you can always just make sure there's a dry erase marker in a nearby drawer.

That's it! No more digging through cabinets to see what you need to buy at the store, no more starting to make dinner only to find out you're missing one of the key ingredients. Naturally, this plan only works if everyone who uses the items in the kitchen utilizes it. So make sure everyone in your household knows the rules: if you use the last of something, check it off on the list. And if you notice something's gone, check it off on the list. 

I hope this is helpful to some of you, I know it's going to be a HUGE help for my home. To clue you in on how bad we needed this, we currently have four containers of crushed oregano.  All purchased at different times. Oi...

Hope you're weekend's going well, and check back later for that sign tutorial. I promise it will be here! =)

Wednesday, January 26

Wine Wine Wine!

I just finished the move Bottle Shock and it was soooo great! I would consider myself an aspiring wine-o, and honestly wouldn't have it any other way. I think it's the complexity that I love. What other beverage has layers of flavor that divulge themselves through the nose, different groups of taste buds, the way it interacts with oxygen, and the lingering aftertaste? The whole things is an entire, beautiful experience.

It took me awhile to appreciate wine, and even longer to appreciate the reds. I think my downfall was expecting the taste to be one-dimensional, like pop, beer, or juice. However, working at a winery taught me to approach wine with a whole 'nother attitude. As I learned to fully experience each glass of wine from swirl to swallow, it's as if an entire world opened to me! No wonder there are so many fans of wine that span back through the centuries. It is a truly beautiful drink! So, in honor of this wine-loving spirit, I'm going to write a little something about how to fully experience this "nectar of the gods."

At Brugdorf's, we use the five S's to guide our guests in their tasting: See, Swirl, Sniff, Sip, and Savor.

See
There are much more colors than red, pink, and white. While these three colors can be considered the "primaries" of wine, each has it's own multitude of tones (just like there's light blue, dark blue, topaz, indigo, cyan, etc.) And the colors can mean things about the wine, like prevalence of oak or sweetness, but not necessarily. We tell our guests at the winery that the single most important thing to do in wine tasting is to leave your expectations and prejudices at the door. EVERY wine is different! So look at the color, tip the glass slightly and hold it up to the light. Note the color variations within the liquid.

Swirl
Gently swirl the wine in your glass. This allows oxygen to mingle with the wine and pulls the flavor out to prepare for the next step.

Sniff
Stick your nose deep into the glass and take a big whiff. Your nose plays a pivotal role in tasting anything, so be sure it incorporate those Olfactory glands. This is where some people can sense a big handful of the flavors and prep their tongues for what's to come.

Sip
Take a small sip of the wine. Don't swallow it yet! Hold it in your mouth and let it roll all over your tongue. Slurp some oxygen into it to pull out more of the flavors and let it warm to your body temperature. See what flavors you can find - oak, cherry, pepper, grapefruit, clove, etc. The flavors are limitless and can range from prominent to subdued.

Savor
Mmmmmm, swallow the wine and just take a moment to let the entire taste fade. Some wines have an extremely strong aftertaste while others disappear from your palette like water. Think about how the wine interacted with you. Did it remind you of a place or memory? Does it make you want a certain food? Think about it, and enjoy it!


While I don't do this whole process with every sip of wine I have, I do go through it with the first few sips. And why not? What's to be lost in exploring the intricacies of wine for a few minutes? Well, except your worries ;)

I encourage each of you to visit your local wineries. They have sprung up all over, and in the most unlikely places. Arizona, for instance! For those of you who are in the area, check out Haslett's own Burgdorf's Winery. They have a HUGE selection. Here's a link to their webpage: http://www.burgdorfwinery.com/

I guarantee there are wineries near you, wherever you are. And each region will have different flavors, so go explore! Also, don't limit yourself to simply grape wines. People have made wine out of pretty much ANY fruit or berry. Even from dandelions! Try everything you get the chance to, you never know which will be your favorite.

If you're interested in the movie that sparked this post, rent it! It's called Bottle Shock and is available to play instantly on Netflix. It's about how California wineries is the 70's broke the myth that French wine was superior to all others by beating them in a blind taste test in Paris. It's kind of cool seeing a "hippe" watch a group of wine snobs taste and judge French and American wines. Here's a link to it:
http://www.bottleshockmovie.com/

Hope you all enjoyed this, and happy tasting!